Last week, we discussed some simple methods for deleting songs from your iPhone. Thankfully, managing your music library within iTunes is equally as easy. When deleting songs on your device is simply not enough, you can elect to delete songs permanently from your Mac. In the following guide, we will show you how to delete songs from iTunes.
How to Delete Songs From iTunes
While you could only delete individual songs at a time (unless working with albums and playlists) from your iPhone, iTunes makes deleting multiple songs easy. For this reason alone, library management becomes much more streamlined:
1. Select the songs you want to delete from your library
If you want to select only one song, simply click on that song to highlight it. The selected track will turn blue to signify this.
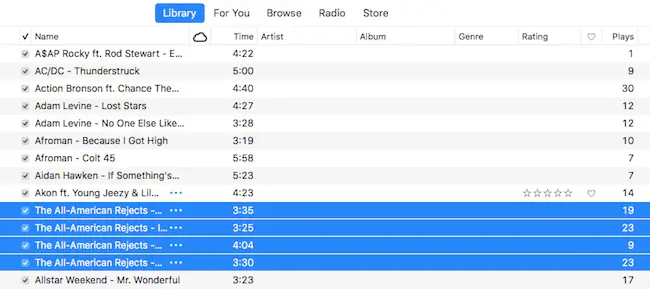
However, you may also manage batches of songs at a time. If attempting to delete multiple songs in succession, click the first song you wish to delete. Then, hold [su_highlight background=”#f294a6″]shift[/su_highlight] and [su_highlight background=”#f294a6″]click[/su_highlight] the final song of that group. This will successfully select the first song, last song, and all songs in between.
2. Control + Click to open the contextual menu
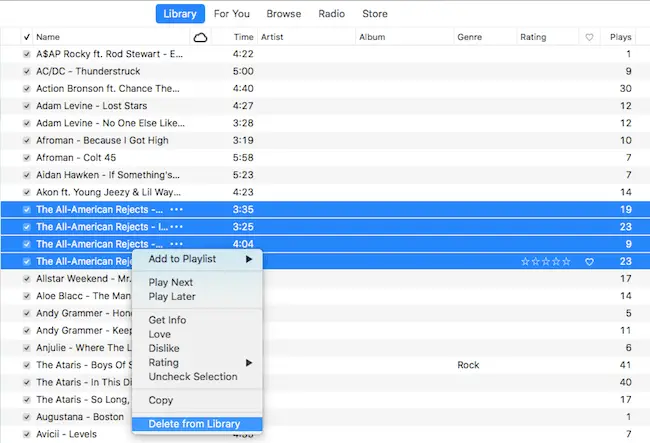
Doing this presents a number of options for song management. As you might have guessed, the option we are looking for resides at the bottom of the menu: Delete From Library. Click this option. iTunes will ask you to confirm your selection:
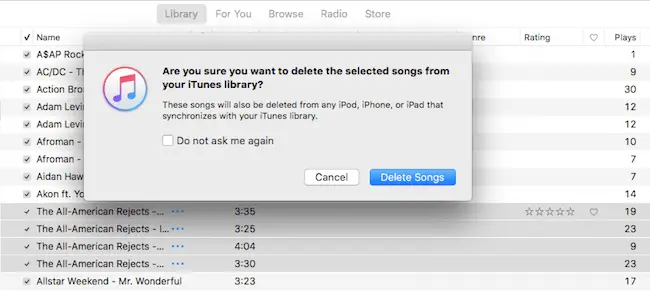
To delete your chosen songs, click Delete Songs. Following this, iTunes will present you with some final options to confirm your selection.
3. Move your deleted song(s) to Trash, or keep them
Finally, iTunes will ask if you want to move your deleted songs to the Trash. If you are dead set on removing these songs entirely from your Mac, choose Move to Trash. From there, you can permanently delete these files by emptying the Trash.
However, you may also choose to hold onto your MP3 file(s). To preserve your music files, choose Keep File:
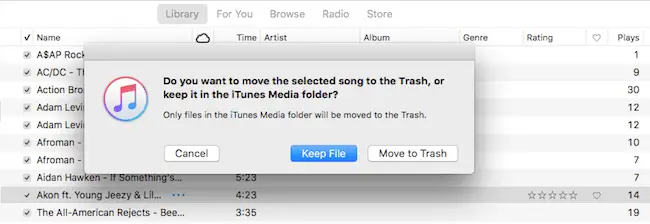
Keeping the file will remove the song(s) from your iTunes library, but will not place the files in the Trash. These music files will remain in whichever folder they currently call home. If you wish to import them again at a later time, you may do so.
Just like that, you will have successfully – and quickly – deleted some unwanted songs from iTunes. If you have second thoughts and want to back out, simply click Cancel.
Keeping these steps in mind, you will no longer have to question how to delete songs from iTunes. Thanks for reading, and happy listening!